Connect Through E-mail
 Download PDF version In today’s world, family and friends, employers and employees, businesses and customers, and government and citizens often communicate by electronic mail (e-mail) over the Internet. It is an easy way to connect and to stay in touch.
Open an E-mail account
To send and receive e-mail, you will need an e-mail account (like an electronic mailbox) with a company that provides e-mail services.
Popular (and free) e-mail services are: Google Gmail, Yahoo!Mail, AOL and Microsoft Outlook.
Step 1: Choose Service Provider
Choose the service provider you would like to use. Go to the provider’s home page. Addresses for the more popular services are:
| Google Gmail | https://mail.google.com |
|---|---|
| Microsoft Outlook | https://outlook.com |
| Yahoo!Mail | https://mail.yahoo.com |
Local Internet service providers, such as Oceanic Time Warner Cable and Hawaiian Telcom, also provide e-mail services when you subscribe to their services.
Step 2: Sign up for an Account
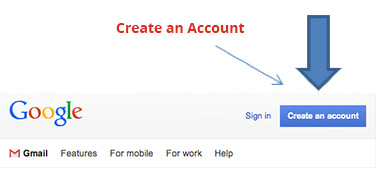 On the provider’s homepage, click on the option labeled “e-mail” or “sign up” to open an account. (Some sites may ask you to register before opening your e-mail account.)
Information you will need to register and open an account may include:
- Information About You
Name, birthdate, gender and phone number. - Login or Username
Choose a username that will become part of your e-mail address. It can be anything you want. People commonly use a variation of their name because it easily allows recipients to identify the sender (e.g. kawika.hanohano or khanohano).Using your real name is also best where you will need to communicate for business purposes, such as with potential employers or with your child’s school.
You can set up another account with a more creative user name for personal e-mails to family and friends (e.g., ukuleleplayer808) or for your business (e.g., samsukuleles).
If your desired name has already been taken, you may try and add numbers or a period between first and last name.
Prepare several options in advance because it may not be easy to change your username later.
Step 3: Create a Password
Create a strong password to secure your e-mail account. Most sites will provide guidance regarding the strength of your password.
Recommendations:
- Use at least eight (8) characters
- Use a combination of letters (upper and lower case), numbers, and symbols
- Do not use your name, address, phone number, sequences (abcdefg) or repeat characters (3333333)
- Do not use personal information such as your birthdate or social security number to keep that information safe
- Write down your password to remember it, but keep it in a safe place
- Change your password every six (6) months or so for security
Step 4: Use a Security Question
You will be asked to create or select a security question. If you forget your password, there is a “Forgot Password” option at sign-in. To get your password, you will need to answer the security question you selected.
Step 5: Complete Account Sign Up
You may be asked to provide certain information to allow the service provider to verify that an actual person (versus a computer-generated program) is creating an account.
You will be asked to review the service provider’s terms of service and to agree to them. If you agree, click on the button.
Step 6: Sign in to your Account
Once your account is set up, you can sign in to your account by entering your username and your password.
If you are accessing your account from your personal, secure computer, you can choose to allow the computer to remember your username and password so that you do not need to sign in each time you turn your computer on.
Step 7: Start E-mailing!
You can now send and receive e-mails. To create an e-mail, click on the tab at the top of the screen that says “New” or “Compose” or the icon that looks like a piece of paper and pencil.
Enter the e-mail address of the person you are e-mailing, add a title to your e-mail in the subject line, then add your message to the body of the e-mail. When finished, hit the “Send” button.
To read e-mails sent to you in your Inbox, simply click on the e-mail.
Tip: Be selective when giving out your e-mail address to avoid getting a lot of “junk mail.”